As a car enthusiast, I’ve dealt with the frustration of cloudy headlights! Foggy headlights can severely impair vision, increasing the risk of accidents. But, with Meguiar’s Headlight Restoration Kit, you can achieve professional-level results and restore your headlights to their former clarity.
I’ve personally used this DIY solution to tackle the common car care issue of foggy headlights. The process involves cleaning, sanding, polishing, and applying a UV protective sealant. By following the steps outlined in this article, you’ll be empowered with the knowledge to achieve a safer, more stylish ride. For more information on the headlight restoration process, you can visit this resource for additional guidance.
Key Takeaways
- Restore foggy headlights using Meguiar’s Headlight Restoration Kit
- Improve vehicle safety and appearance
- Enhance your car’s value with clear headlights
- DIY solution for professional-level results
- Regular maintenance can help maintain clarity
Understanding Headlight Fogging and Its Impact
I’ve experienced firsthand how headlight fogging can compromise visibility, especially at night! Foggy headlights are not just a cosmetic issue; they can significantly affect driving safety. To tackle this problem effectively, it’s essential to understand why headlights become cloudy and yellow, how this condition impacts driving, and the benefits of restoring them using Meguiar’s Headlight Restoration Kit.
Why Headlights Become Cloudy and Yellow
Headlights become cloudy due to the degradation of the polycarbonate lens caused by UV exposure, oxidation, and environmental factors. This deterioration leads to a hazy or yellowish appearance, diminishing the light output.
How Foggy Headlights Reduce Visibility and Safety
Foggy headlights scatter light, reducing its intensity and range. This scattering effect compromises the driver’s ability to see the road ahead, particularly at night or in low-visibility conditions, thus increasing the risk of accidents.
The Cost Benefits of DIY Restoration vs. Professional Services
Restoring headlights using Meguiar’s DIY kit is cost-effective compared to professional services. It not only saves money but also empowers car owners with a practical skill, ensuring their vehicle’s headlights remain clear and safe.

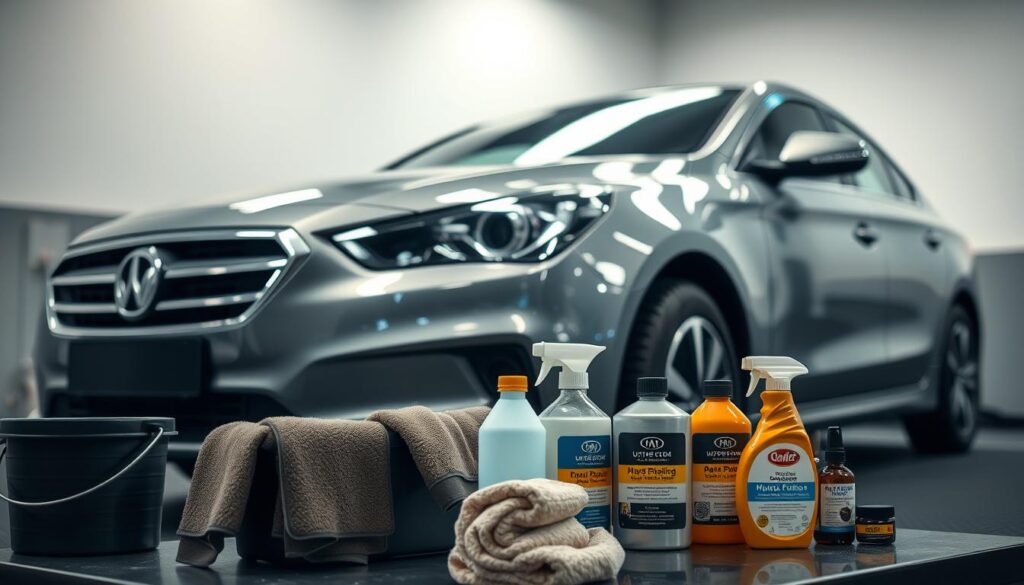
What’s Included in Meguiar’s Headlight Restoration Kit
I’ve found that Meguiar’s Headlight Restoration Kit is a game-changer for anyone looking to restore their vehicle’s headlights without breaking the bank. The kit is designed to be user-friendly, with all the necessary components to restore your headlights to their former glory.
Components of the Basic One-Step Kit
The basic one-step kit includes a specialized restoration compound and a unique pad designed to work together to remove oxidation and restore clarity. This kit is perfect for headlights that are mildly foggy.
Components of the Meguiar’s Two-Step Headlight Restoration Kit
The two-step kit takes it a step further by including an additional fine polishing compound to achieve an even higher level of clarity. This kit is ideal for more severely damaged headlights.
- A specialized restoration compound
- A unique pad for application
- A fine polishing compound (for the two-step kit)
Additional Tools You’ll Need to Supply
While the kit includes most of what you need, you’ll also require a few additional tools, such as masking tape and a cleaning cloth.
Optional Power Drill Attachment
For those who want to make the job even easier, a power drill attachment can be used to speed up the restoration process.
To get the Meguiar’s Headlight Restoration Kit, you can visit the official Meguiar’s website at Meguiar’s Official Site. The kit includes a top-notch headlight coating that’s among the best headlight coating options available.
Preparing for the Headlight Restoration Process
A successful headlight restoration starts with thorough preparation – let’s get started! Before we dive into the actual restoration, we need to make sure our headlights are properly prepped.
Thoroughly Cleaning the Headlight Surface
Begin by giving your headlights a good clean using a mild soap and water. This removes any loose dirt and debris, giving you a clean slate to work on. I’ve found that a microfiber cloth is perfect for this job, as it won’t scratch the surface.
Properly Taping Off Surrounding Paint and Trim
Next, use some painter’s tape to carefully mask off the surrounding paint and trim. This is a crucial step to prevent any accidental damage or overspray during the restoration process. Make sure the tape is pressed down firmly to create a tight seal!
Safety Precautions and Ideal Working Conditions
Now, let’s talk safety. When working with any chemicals, it’s essential to wear protective gear like gloves and safety glasses. Also, choose a well-ventilated area to work in, and avoid direct sunlight. Using a clear headlight spray and understanding the importance of UV headlight protection will help you achieve a long-lasting finish.
Step-by-Step Headlight Restoration Process
Let’s dive into the step-by-step process of restoring foggy headlights using Meguiar’s restoration kit! With a plastic headlight restorer, you can achieve a like-new finish on your vehicle’s headlights.
Sanding the Oxidized Headlight Surface
The first step in restoring your headlights is sanding the oxidized surface. This process involves working through different grit levels to achieve a smooth finish.
Working Through Different Grit Levels
Start with a coarse grit sandpaper and gradually move to finer grits. This progressive sanding helps remove oxidation and scratches, preparing the surface for polishing.
Manual vs. Drill-Assisted Sanding Techniques
You can sand the headlights manually or use a drill-assisted technique for more efficiency. I recommend using a drill with a sanding attachment for larger headlights or for those with heavy oxidation.
Polishing to Restore Clarity
After sanding, the next step is polishing the headlight to restore its clarity. Use the polishing compound provided in Meguiar’s kit and apply it using a clean, soft cloth. Buff the headlight until it becomes clear and shiny.
Final Cleaning Before Coating Application
Before applying the headlight coating, give the headlight a final clean to remove any residue from the polishing process. Use a microfiber cloth and a gentle cleaning solution to ensure the surface is spotless.
By following these steps and using Meguiar’s Headlight Restoration Kit, you can achieve professional-level results at home. The plastic headlight restorer kit makes it easy to restore your headlights to their former glory.
Applying Meguiar’s Keep Clear Headlight Coating
After restoring your headlights to their former glory, applying Meguiar’s Keep Clear Headlight Coating is the key to maintaining that clarity! I’ve personally seen how this coating can protect headlights from the elements, keeping them clear for a long time.
UV Protection Benefits
Meguiar’s Keep Clear Headlight Coating offers excellent UV protection, which is crucial for preventing headlights from fogging up again. The coating acts as a barrier against harmful UV rays, ensuring your headlights remain clear and bright. This is especially important if you live in areas with intense sunlight.
Proper Application Technique
To apply the coating correctly, make sure to follow the instructions provided with Meguiar’s kit. Typically, you’ll need to apply a thin, even layer to the headlight surface. I’ve found that using a clean, lint-free cloth helps achieve an even coverage, which is vital for the coating’s effectiveness.
Required Drying and Curing Times
After applying the coating, it’s essential to let it dry and cure for the recommended time. This can vary depending on environmental conditions, but generally, you’ll need to wait at least 30 minutes to an hour before exposing the headlights to moisture or driving at night.
When and How to Apply a Second Coat
If the first coat doesn’t provide the desired level of clarity or protection, you may need to apply a second coat. Make sure the first coat is fully dry before applying the second one. Following these steps and using Meguiar’s Keep Clear Headlight Coating can result in a professional-level finish that lasts, as backed by positive meguiars headlight coating reviews.
Troubleshooting Common Restoration Issues
While Meguiar’s Headlight Restoration Kit is designed to make the restoration process easier, troubleshooting is sometimes necessary! Even with the best preparation and techniques, issues can still arise during the restoration process. In this section, we’ll tackle some common problems that may occur, such as dealing with extremely damaged headlights, addressing streaking or uneven results, and fixing coating application issues.
Dealing with Extremely Damaged Headlights
If your headlights are severely oxidized or damaged, the Meguiar’s two-step headlight restoration kit can be a lifesaver! This kit is designed to handle more severe cases of headlight deterioration. Start by assessing the damage; if it’s too severe, consider seeking professional help. However, for most cases, the two-step process of sanding and polishing can significantly improve the headlight’s clarity.
Addressing Streaking or Uneven Results
Streaking or uneven results can be frustrating! To avoid this, ensure you’re using the correct sanding and polishing techniques. Always work in a well-lit area and inspect your progress frequently. If you notice streaks, revisit your sanding pattern and adjust as needed.
Fixing Coating Application Problems
Coating application issues, such as bubbling or peeling, can be problematic. Let’s dive deeper into these issues.
Bubbling or Peeling
If you notice bubbling or peeling after applying the coating, it might be due to improper surface preparation or applying the coating in inappropriate conditions. Ensure the headlight is clean and dry before application, and follow the recommended drying times.
Hazing After Application
Hazing can occur if the coating is not applied evenly or if the headlight surface wasn’t properly prepared. To fix this, gently buff the area with a microfiber cloth. If the issue persists, consider reapplying the coating following the manufacturer’s instructions.
Conclusion: Maintaining Your Restored Headlights
Now that you’ve restored your headlights to their former glory using Meguiar’s headlight restoration kit, it’s essential to maintain them to ensure they stay clear and continue to provide optimal visibility and safety on the road.
I recommend regularly cleaning your headlights with a mild soap and drying them thoroughly to prevent water spots. Applying Meguiar’s Keep Clear Headlight Coating is also a great way to provide long-lasting car headlight protection against UV damage and oxidation.
By following these simple maintenance steps and using a high-quality coating like Meguiar’s Keep Clear Headlight Coating, you’ll be able to enjoy a safer, more stylish ride for miles to come. Proper car headlight protection is crucial for maintaining your vehicle’s overall appearance and safety features.