As a car enthusiast, I’ve learned that applying car wax is crucial for maintaining your vehicle’s appearance and protecting its paint. A well-waxed car not only looks great, but it’s also better protected against the elements. In this comprehensive guide, I’ll walk you through the process of achieving a showroom shine. We’ll cover the benefits of waxing, the necessary tools and products, and a step-by-step guide. For optimal results, it’s recommended to wax your car every 3 to 6 months, as suggested by detailing experts.
Key Takeaways
- Understand the importance of waxing your car for protection and appearance.
- Learn the different types of car wax and their benefits.
- Discover the necessary tools and products for a successful waxing process.
- Follow a step-by-step guide to achieve a showroom shine.
- Maintain your car’s wax coat with regular detailing and touch-ups.
Understanding Car Wax and Its Benefits
Car wax is more than just a cosmetic finish; it’s a protective layer that preserves your vehicle’s paint. As a car enthusiast, I’ve seen firsthand how regular waxing can maintain a vehicle’s showroom shine while protecting it from environmental hazards.
There are several types of car wax available, each with its own set of advantages. Understanding these differences is key to selecting the right wax for your vehicle.
To make the best choice, it’s also important to understand how car wax differs from polish—two terms that are often confused but serve very different purposes. I explore this in detail in my article, Understanding the Difference Between Car Wax and Polish, where I break down their functions and how they complement each other in car care.
Types of Car Wax: Paste, Liquid, and Spray
Car wax comes in three primary forms: paste, liquid, and spray. Paste wax is known for its durability and is often used by professionals. Liquid wax is easier to apply and remove, making it a favorite among DIY enthusiasts. Spray wax is the most convenient, offering a quick, easy application, though it may not last as long as other types.
| Type of Wax | Durability | Ease of Application |
|---|---|---|
| Paste Wax | High | Moderate |
| Liquid Wax | Moderate | Easy |
| Spray Wax | Low | Very Easy |
Why Regular Waxing Protects Your Vehicle’s Value
Regular waxing is not just about maintaining your car’s appearance; it’s also about protecting its value. By creating a barrier against UV rays, contaminants, and minor scratches, waxing helps preserve the paint and overall condition of your vehicle, thereby maintaining its resale value.

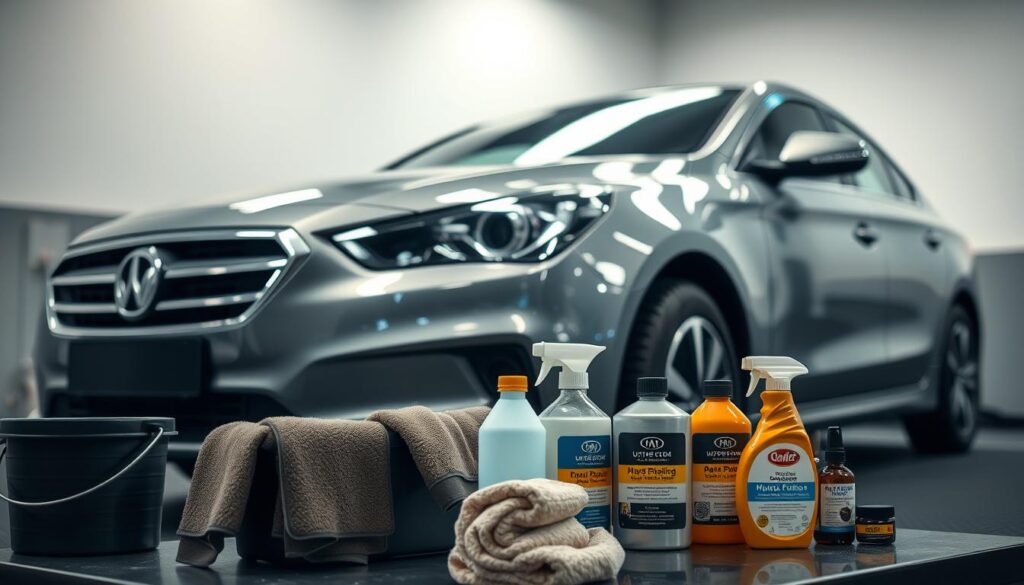
Essential Tools and Products for Car Waxing
To achieve a professional-level wax finish, it’s crucial to have the right tools and products. A well-prepared detailer can make all the difference in the outcome of the waxing process.
Must-Have Waxing Supplies Checklist
Before starting, ensure you have the following essential supplies:
- High-quality car wax suitable for your vehicle’s paint type
- Applicator pads or foam applicators – Check our product category for best applicators.
- Microfiber towels for buffing – Have a look at our shop category.
- A clean, soft-bristle brush for removing debris – Check our shop for best sellers.
Choosing the Right Wax for Your Car’s Paint Type
Selecting the appropriate wax depends on your car’s paint type. For instance:
| Paint Type | Recommended Wax Type | Benefits |
|---|---|---|
| Clear Coat | Synthetic or Carnauba-based wax | Provides durable protection and enhances shine |
| Matte Finish | Specialized matte wax | Maintains the matte appearance while protecting the surface |
Applicators and Microfiber Towels: Quality Matters
Using high-quality applicators and microfiber towels can significantly impact the waxing outcome. Microfiber towels are particularly effective for buffing, as they are gentle on the paint and efficient at removing excess wax.

Preparing Your Car for Waxing
Proper preparation is the foundation of a successful car waxing process, ensuring a smooth and even finish. Before applying wax, your car’s surface must be thoroughly cleaned and decontaminated to allow the wax to adhere evenly and effectively.
Proper Washing Techniques to Remove Surface Contaminants
Start by washing your car using a mild car wash soap and a soft, microfiber mitt to prevent scratching the paint. It’s crucial to remove all surface contaminants, including dirt, tar, and bug splatters, which can interfere with the wax’s ability to bond with the paint. Rinse the car thoroughly to remove all soap residue.
For a step-by-step breakdown and helpful tips to make the process even easier, check out my detailed guide: Effortless Car Cleaning: Your Guide to Washing a Car.
Clay Bar Treatment: When and How to Decontaminate
After washing, use a clay bar to remove embedded contaminants that washing can’t eliminate. Glide the clay bar gently over the paint surface, using a lubricant like detailing spray to prevent scratching. This step is essential for achieving a smooth finish.
Surface Inspection and Paint Correction Steps
Once the surface is clean and decontaminated, inspect the paint for imperfections such as scratches, swirl marks, or oxidation. Address any issues found using appropriate paint correction techniques, such as polishing or compounding, to restore the paint’s clarity and gloss. This step ensures that the wax application will be flawless.
How to Apply Car Wax: Step-by-Step Process
Having prepared your car, you can now proceed to apply the wax with confidence. The application process is crucial for achieving a deep, glossy finish that lasts. In this section, we’ll guide you through the step-by-step process of applying car wax, covering different techniques for various types of wax.
Application Techniques for Paste, Liquid, and Spray Waxes
Different types of wax require specific application techniques. For paste wax, use a circular motion with a foam applicator to spread it evenly. Learn more about applying paint sealants for additional protection. For liquid wax, a thin, even layer is key; use a microfiber applicator to avoid streaks. Spray wax is the easiest to apply, using a spray bottle to cover the surface evenly, then buffing with a microfiber cloth.
Working in Sections: The Systematic Approach
To ensure even coverage and prevent wax from drying out, work in small sections, typically about 2×2 feet. This systematic approach allows you to maintain control and inspect your work as you go. For each section, apply the wax, allow it to haze, and then buff it off before moving on to the next section.
Buffing and Removing: Perfect Timing and Technique
The timing of buffing is critical; it should be done when the wax has hazed over but not fully dried. Use a clean, microfiber towel to buff off the wax in a circular motion. For more detailed information on buffing techniques, check out expert polishing techniques. Inspect your work after buffing each section to ensure no wax residue remains, revealing a glossy, protected surface.
By following this step-by-step guide, you’ll achieve a professional-level waxing result, enhancing your car’s appearance and protecting its paint. Regular waxing, as part of your car maintenance routine, will keep your vehicle looking its best and maintain its value over time.
Advanced Waxing Techniques for Professional Results
Professional results in car waxing aren’t just about the products used, but also the techniques applied. To achieve a showroom-quality finish, it’s essential to go beyond the basics and incorporate advanced methods into your waxing routine.
Machine vs. Hand Application: Pros and Cons
When it comes to applying wax, detailers often debate between machine and hand application. Machine application using a dual-action polisher can provide a more uniform finish and reduce the risk of human error. However, it requires practice to master and can be more aggressive on certain paint types. On the other hand, hand application offers more control and is generally safer for delicate surfaces, but it can be more time-consuming and may result in uneven coverage if not done carefully.
Layering Wax for Maximum Durability and Depth
Layering wax is a technique that involves applying multiple thin coats, allowing each layer to cure before adding the next. This approach enhances the durability of the wax finish and deepens the paint’s gloss. For maximum durability, consider using a quality car wax that’s designed for layering.
Here are two excellent car waxes available on Amazon UK that are ideal for layering to boost durability and depth:
Turtle Wax Carnauba Car Wax 500 ml
-
A rich blend of carnauba and proprietary polymers, this wax delivers a deep, glossy finish and strong protection—perfect for multiple layered coats.
-
It ranks highly in Amazon car wax listings and enjoys a 4.6/5 rating from 400+ reviews.
-
Turtle Wax’s advanced formula facilitates smooth application and effortless buffing, making it ideal for the layering technique you described.
Check out Turtle Wax Carnauba Car Wax on Amazon.
Formula 1 Carnauba Paste Wax
-
A time-tested paste wax renowned for added depth and a luxurious shine.
-
With a 4.6/5 rating across 200+ reviews, this product is well-respected for longevity and clarity.
-
Great as a base layer, especially when alternating between creamy paste and spray wax layers for added durability.
Explore Formula 1 Carnauba Paste Wax on Amazon.
Special Techniques for Black and Dark-Colored Cars
Waxing black and dark-colored cars requires special attention to detail to avoid accentuating imperfections. Using a black light or inspecting the paint under direct sunlight can help identify areas that need extra care. Applying wax in thin, even coats and using a microfiber towel to buff the surface can help achieve a flawless finish.
Common Mistakes to Avoid When Waxing Your Car
To achieve a flawless finish when waxing your car, it’s crucial to be aware of potential mistakes. Even with the best intentions, errors can occur, compromising the quality of the wax job. By understanding these common pitfalls, you can take steps to avoid them and ensure a professional-level finish.
Temperature and Environmental Considerations
One critical factor to consider is the temperature and environmental conditions during the waxing process. Waxing in direct sunlight or high temperatures can cause the wax to dry too quickly, making it difficult to buff out. Conversely, waxing in cold temperatures can make the wax too hard to apply evenly. Aim for a shaded area with moderate temperatures between 60°F to 80°F for optimal results.
Avoiding Plastic and Rubber Contact
Another common mistake is allowing wax to come into contact with plastic and rubber trim. Wax residue on these surfaces can be challenging to remove and may leave unsightly stains. Use masking tape or trim guards to protect these areas before applying wax.
Post-Waxing Care and Maintenance Schedule
After waxing your car, maintaining the finish is crucial. Regular washing and drying are essential, but avoid using harsh chemicals that can strip away the wax. Establish a maintenance schedule that includes regular waxing every 2-3 months to keep your car’s finish looking its best.
Conclusion: Maintaining Your Car’s Showroom Shine
Applying car wax is a straightforward process that requires some knowledge and the right techniques. By following the steps outlined in this ultimate car waxing tutorial, you’ll be able to maintain your car’s showroom shine and protect its paint for years to come.
To achieve professional results, remember to prepare your car’s surface properly before applying wax. Use the right tools and products, and follow the diy car waxing tips provided in this guide. Regular waxing is key to keeping your car looking its best, so make it a part of your regular maintenance routine.
By mastering how to apply car wax, you’ll not only enhance your car’s appearance but also protect its value. With the right techniques and products, you can achieve a showroom shine that turns heads on the road. Make car waxing a regular part of your car care routine to enjoy a well-maintained vehicle for years to come.