A well-maintained vehicle can retain up to 90% of its original value, with a significant portion of this retention attributed to a flawless paint finish achieved through best car polishing techniques.
Achieving a showroom shine is not just about aesthetics; it’s also about protecting your vehicle’s exterior from the elements. Effective car polishing techniques can make all the difference in maintaining your car’s appearance and resale value.
To get started, it’s essential to understand the importance of mastering the best car polishing techniques. With the right knowledge and skills, you can achieve a professional-grade finish that rivals that of a showroom.
Key Takeaways
- Proper car polishing can retain up to 90% of a vehicle’s original value.
- A flawless paint finish is crucial for a vehicle’s appearance and resale value.
- Effective car polishing techniques protect the vehicle’s exterior from the elements.
- Mastering the best car polishing techniques is essential for a professional-grade finish.
- A showroom shine is not just about aesthetics, but also about protection.
Understanding Car Polishing Fundamentals
Car polishing is a crucial step in maintaining your vehicle’s appearance, but what exactly does it achieve? At its core, car polishing is about enhancing the paint’s clarity and gloss by removing imperfections.
What Car Polishing Actually Does to Your Paint
Car polishing involves using abrasives to level the paint surface, removing minor scratches and swirl marks that dull the finish. This process is essential for automotive paint correction.
The Science of Paint Correction
Paint correction is a precise process that relies on the science of tribology, the study of friction and wear. By using the right polishing compounds and techniques, you can effectively correct paint defects.
How Abrasives Work on Clear Coat
Abrasives in polishing compounds work by gently cutting away at the clear coat to remove imperfections, smoothing out the surface. The choice of abrasive depends on the level of correction needed.
Difference Between Polishing, Waxing, and Buffing
Many car owners confuse polishing, waxing, and buffing, but each serves a distinct purpose. Polishing corrects the paint, waxing protects it, and buffing is a technique used in both polishing and waxing.
When to Polish vs. When to Wax
Polishing is necessary when your car’s paint is damaged or oxidized. Waxing, on the other hand, is a regular maintenance task that protects the paint. Use a polishing compound selection guide to choose the right product for your needs.

Understanding when to polish versus when to wax can make a significant difference in your car’s appearance and longevity. Regular swirl mark removal and polishing will keep your car looking its best.
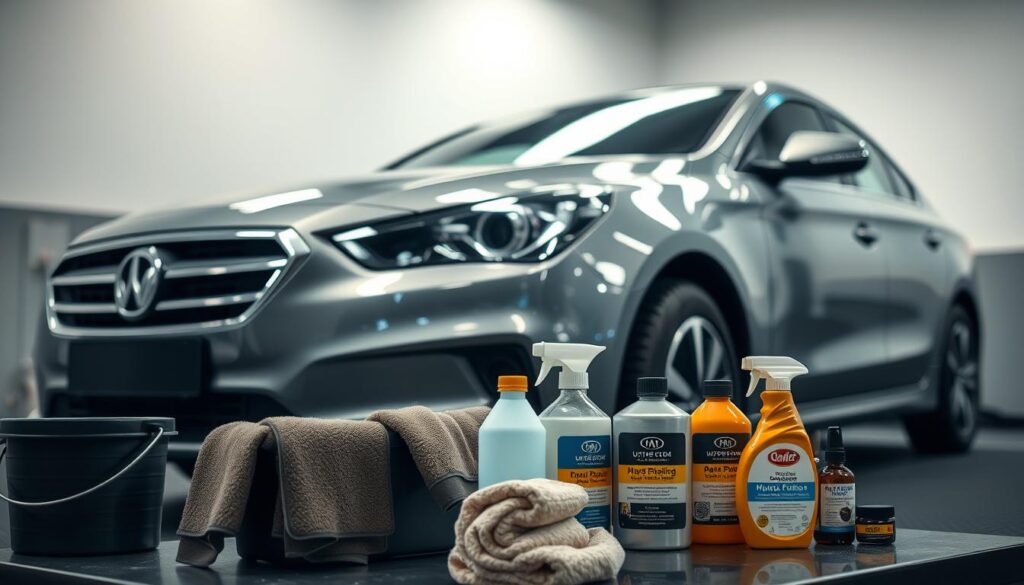
Essential Tools and Products for Professional Results
For those seeking to elevate their car’s appearance, selecting the right tools and products is paramount. Professional-grade car polishing is as much about the technique as it is about the equipment and materials used.
Polishing Machines: Rotary vs. Dual Action Polishers
The choice between rotary and dual action polishers is crucial. Rotary polishers are powerful and often used for heavy correction, while dual action polishers are more versatile and safer for beginners.
Best Entry-Level Machines for Beginners
For those new to car polishing, entry-level dual action polishers like the DeWalt DWE6423 or Porter-Cable 7424 are excellent choices. They offer a balance between performance and ease of use.
Professional-Grade Equipment Options
Professional detailers often prefer high-end rotary polishers like the DeWalt DWP849X or dual action polishers such as the Rupes LHR21. These machines provide superior performance and durability.

Types of Polishing Pads and Their Uses
The type of polishing pad used can significantly affect the outcome. Common types include foam, microfiber, and wool pads, each suited for different tasks and levels of correction.
Foam vs. Microfiber vs. Wool
- Foam pads are versatile and come in various densities for different applications.
- Microfiber pads are known for their ability to produce a high-gloss finish.
- Wool pads are more aggressive and often used for heavy correction.
Selecting Quality Polishing Compounds and Products
Choosing the right polishing compound is critical. Understanding the compound grading systems can help in making an informed decision.
Compound Grading Systems Explained
Polishing compounds are graded based on their abrasiveness, with systems like the Cutting Index helping to quantify their effectiveness for different types of paint correction.
Preparing Your Vehicle for Polishing
A well-prepared vehicle is the foundation of a great car polishing job, leading to a showroom-quality finish. Before diving into the polishing process, it’s essential to ensure your car is properly cleaned and prepared.
Thorough Washing and Decontamination Steps
The first step in preparing your vehicle is a thorough wash. This isn’t just about removing dirt; it’s about starting with a clean slate.
Two-Bucket Washing Method
The two-bucket washing method is a technique that helps prevent swirl marks and scratches. It involves using one bucket for soapy water and another for clean water to rinse your wash mitt.
- Fill one bucket with soapy water.
- Use the other bucket for clean water to rinse your wash mitt.
- Repeat the process until your car is clean.
Iron Fallout Removal Process
Iron fallout from brake dust and industrial fallout can contaminate your car’s paint. Using an iron fallout remover can help eliminate these contaminants.
Key steps include:
- Spray the iron fallout remover onto the car’s surface.
- Allow it to dwell for a few minutes.
- Rinse thoroughly with water.
Clay Bar Treatment: Why It’s Crucial
A clay bar treatment is vital for removing contaminants that washing can’t eliminate. It helps achieve a smooth surface.
Clay Bar Alternatives and Lubricants
For those who prefer not to use a traditional clay bar, alternatives like synthetic clay or detailing sprays can be effective. Using a lubricant is crucial to prevent scratching the paint.
Some popular lubricants include:
- Detailing sprays.
- Water-based lubricants.
Masking and Protection of Sensitive Areas
Protecting sensitive areas like trim, rubber, and plastic is crucial to prevent damage during the polishing process.
Trim, Rubber, and Plastic Protection Techniques
Using the right products and techniques can safeguard these areas. Masking tape and protective dressings can be applied to prevent overspray and staining.
By following these steps, you’ll be able to prepare your vehicle for polishing effectively, ensuring a professional-quality finish.
Assessing Your Car’s Paint Condition
Understanding the state of your car’s paint is essential for effective automotive paint correction. A thorough assessment helps in identifying the types of damage and determining the appropriate polishing strategy.
Identifying Different Types of Paint Damage
Paint damage can manifest in various forms, including oxidation, clear coat failure, swirls, scratches, and water spots. It’s crucial to differentiate between these to apply the correct correction technique.
Oxidation vs. Clear Coat Failure
Oxidation occurs when the paint’s surface breaks down due to UV exposure, leading to a dull appearance. Clear coat failure, on the other hand, involves the deterioration of the clear coat layer, often resulting in a hazy or cracked finish.
Swirls vs. Scratches vs. Water Spots
- Swirls: Fine, circular scratches that reflect light poorly.
- Scratches: Deeper marks that can penetrate through the clear coat.
- Water Spots: Mineral deposits left after water evaporates, potentially etching into the paint.
Using Proper Lighting for Inspection
Proper lighting is vital for accurately assessing paint damage. Using tools like LED swirl finders can help illuminate defects that are otherwise hard to see.
LED Swirl Finders and Inspection Tools
LED swirl finders provide intense, focused light that highlights imperfections, making it easier to identify areas that need correction.
Creating a Polishing Strategy Based on Assessment
Once the paint condition is assessed, a polishing strategy can be developed. This includes deciding on the appropriate polishing compounds and techniques.
Paint Thickness Measurement Importance
Measuring paint thickness is crucial to avoid over-polishing, which can lead to damage or removal of too much paint. Using a paint thickness gauge helps in determining the safe limits for polishing.
Best Car Polishing Techniques for Beginners
Car polishing can seem daunting for beginners, but with the right techniques, anyone can achieve a showroom finish. The key to successful car polishing lies in understanding the fundamentals and applying them correctly.
Starting with a Test Spot
Before diving into polishing your entire vehicle, it’s crucial to start with a test spot. This allows you to gauge the effect of the polish on your car’s paint without risking damage to the entire surface.
Selecting an Inconspicuous Area
Choose an area that is not easily visible, such as the inside of the fuel flap or under the rear bumper, to test your polishing technique. This ensures that any potential mistakes are hidden from view.
Before and After Documentation
Documenting your test spot before and after polishing is essential. Take clear photos to compare the results, which will help you understand the effectiveness of your technique.
Proper Machine Handling and Movement Patterns
Handling the polishing machine correctly is vital for achieving a flawless finish. The way you move the machine across the surface can significantly impact the outcome.
Cross-Hatch Pattern Technique
Using a cross-hatch pattern—moving the machine in overlapping passes in different directions—helps ensure an even application of polish and reduces the risk of creating swirl marks.
Section-by-Section Approach
Divide your car’s surface into sections and complete one section at a time. This methodical approach helps maintain evenness and prevents the polish from drying out before you can buff it off.
Speed and Pressure Control Fundamentals
Controlling the speed and pressure of your polishing machine is critical for effective polishing.
Machine Speed Settings for Different Stages
Different stages of polishing may require different machine speeds. Start with a lower speed for cutting compounds and increase the speed for finer polishing stages.
Letting the Machine Do the Work
Apply gentle to moderate pressure, depending on the stage of polishing. Let the weight of the machine do the work; excessive pressure can lead to paint damage or create holograms.
Advanced Polishing Methods for Stubborn Defects
When dealing with severe paint imperfections, detailing professionals often turn to multi-stage polishing processes. These advanced techniques are designed to address deep scratches, swirl marks, and other defects that cannot be corrected with standard polishing methods.
Multi-Stage Polishing Process Explained
A multi-stage polishing process involves a series of steps, each utilizing different polishing compounds and pads to progressively refine the paint surface. This approach allows for more effective correction of stubborn defects.
Compound to Polish to Finishing Sequence
The typical sequence begins with a coarse polishing compound to remove significant imperfections, followed by a finer polish to refine the surface, and concludes with a finishing product to enhance gloss and clarity.
Wet Sanding Techniques for Severe Imperfections
For severe paint damage, wet sanding may be necessary. This technique involves using progressively finer grits of sandpaper to smooth out the paint surface.
Grit Selection and Progression
Selecting the right grit and progression is crucial. It typically starts with a coarser grit (around 600-800) to remove significant defects, then moves to finer grits (1000-1500 and beyond) for smoothing.
Hand vs. Machine Sanding
While hand sanding provides more control, machine sanding can be more efficient for larger areas. The choice between the two often depends on the extent and location of the damage.
Compound-to-Polish Progression Strategy
A key aspect of advanced polishing is the progression from coarse compounds to finer polishes. This diminishing abrasive technology ensures that the paint surface is progressively refined without leaving behind scratches or marks.
Diminishing Abrasive Technology
This technology is fundamental to achieving a flawless finish. By gradually reducing the abrasive level, detailers can correct paint defects while maintaining the integrity of the paint surface.
Effective Swirl Mark and Scratch Removal
Swirl marks and scratches can detract from your car’s appearance, but with the right methods, you can restore its original shine. Understanding the causes and appropriate correction techniques is crucial for achieving a flawless finish.
Understanding the Science Behind Swirl Marks
Swirl marks are fine scratches that appear on the car’s surface, typically as a result of improper washing or drying techniques. They can also be caused by using low-quality car care products or by the natural wear and tear of the vehicle’s paint.
Common Causes of Swirl Formation
Common causes include using dirty or rough cloths, circular motions during washing, and using automatic car washes with brushes. Understanding these causes can help you take preventive measures.
Targeted Techniques for Different Scratch Depths
Not all scratches are the same; they vary in depth and severity. Assessing the scratch correctly is the first step in determining the appropriate correction technique.
The Fingernail Test for Scratch Assessment
The fingernail test involves running your fingernail over the scratch. If it catches, the scratch is likely deep and may require more than just polishing to correct.
Single-Stage vs. Multi-Stage Correction
Single-stage correction involves using one polish to correct the defect, suitable for minor scratches. Multi-stage correction involves several steps, including compounding, polishing, and finishing, for deeper scratches.
Avoiding New Swirls During Correction
To avoid creating new swirls, it’s essential to use the correct polishing techniques and tools. This includes using high-quality polishing pads and ensuring they are clean during use.
Proper Pad Cleaning During Sessions
Cleaning the polishing pad regularly during a polishing session can prevent the accumulation of debris, which can cause new scratches. Use a dedicated pad cleaning solution for this purpose.
By understanding the science behind swirl marks and using targeted techniques for scratch removal, you can significantly improve your car’s appearance. Regular maintenance, proper car care practices and best car polishing techniques are keys to preventing these issues.
Paint Correction for Different Vehicle Surfaces
Paint correction is not a one-size-fits-all process; different vehicle surfaces demand distinct approaches. Whether you’re dealing with curved and contoured areas, hard-to-reach spots, or varying paint types, understanding the nuances of each surface is crucial for achieving a flawless finish.
Handling Curved and Contoured Areas
Curved and contoured areas require precision and the right tools to achieve a uniform finish. When working on these complex surfaces, it’s essential to select the appropriate polishing pad size.
Smaller Pad Selection for Detailed Work
For intricate areas, a smaller polishing pad is often necessary. This allows for more precise control and ensures that you can effectively target small, curved sections without damaging surrounding areas.
Techniques for Hard-to-Reach Spots
Hard-to-reach spots, such as around trim and emblems, require specialized techniques and tools. Mastering these areas is key to a comprehensive paint correction.
Hand Polishing Methods and Tools
In some cases, hand polishing is the best approach for hard-to-reach areas. Using the right hand polishing tools, such as detailing brushes or small, handheld polishers, can make a significant difference in achieving a uniform finish.
Adjusting Your Approach for Different Paint Types
Different paint types, including soft, hard, and ceramic-infused paints, require adjusted techniques for optimal results.
Soft vs. Hard Paint Considerations
Soft paints are more prone to scratches and swirls, necessitating a gentler approach. In contrast, hard paints can withstand more aggressive polishing but still require careful technique to avoid damage.
Special Techniques for Ceramic-Infused Paints
Ceramic-infused paints offer enhanced durability but may require specific polishing compounds and techniques. Understanding these nuances is vital for effective paint correction on such surfaces.
By adapting your paint correction techniques to the specific surfaces and paint types of your vehicle, you can achieve a showroom-quality finish that enhances the overall appearance and value of your car.
- Use the correct polishing pad size for curved areas.
- Employ hand polishing for hard-to-reach spots.
- Adjust your technique based on the paint type.
Protecting Your Newly Polished Finish
Once you’ve polished your car to perfection, it’s essential to safeguard that finish. Protecting your newly polished car is crucial for maintaining its appearance and longevity.
Applying Sealants and Waxes Correctly
To effectively protect your car’s paint, you need to apply sealants and waxes correctly. Synthetic waxes offer durability and ease of application, while natural waxes provide a deep, warm glow. Understanding the benefits of each can help you make an informed decision.
Synthetic vs. Natural Wax Benefits
- Synthetic Wax: Lasts longer, easier to apply and remove.
- Natural Wax: Provides a rich, warm appearance, often preferred for classic cars.
Application and Removal Best Practices
Always apply wax or sealant in a cool, shaded area. Use a clean, microfiber applicator to avoid scratching the paint. Remove the product with a microfiber towel, gently buffing to avoid swirl marks.
Ceramic Coating Application Tips
Ceramic coatings offer advanced protection against environmental contaminants. For a successful application, ensure the surface is clean and free of defects.
Professional vs. DIY Ceramic Coatings
While DIY ceramic coatings are available, professional application ensures a flawless finish and optimal durability. Consider your skill level and the desired outcome when deciding.
Long-Term Protection Strategies
Layering protection products can enhance durability. Start with a ceramic coating for a strong base, then add a layer of wax for additional protection and shine.
Layering Protection Products
- Apply a ceramic coating as the base layer.
- Add a synthetic wax on top for extra protection.
- Regularly inspect and maintain your car’s finish.
By following these strategies, you can effectively protect your car’s newly polished finish, ensuring it remains vibrant and protected for years to come.
Troubleshooting Common Polishing Problems
Even with the best techniques, car polishing can sometimes result in unwanted effects like holograms or buffer trails. Understanding how to troubleshoot these issues is crucial for achieving a flawless finish.
Dealing with Holograms and Buffer Trails
Holograms and buffer trails are common problems that can mar the appearance of your vehicle’s paint. Identifying the causes is the first step towards correction.
Identifying Causes of Hologramming
Hologramming often results from improper machine handling or using the wrong polishing pad. Ensuring the correct technique and equipment can minimize this risk.
Correction Techniques for Buffer Trails
Buffer trails can be corrected by adjusting your polishing pattern and ensuring the pad is properly maintained. Regular cleaning of the pad is essential.
Fixing Uneven Polish Application
Uneven polish application can lead to a lackluster finish. Residue removal is a critical step in addressing this issue.
Residue Removal Methods
Using the right cleaning products and techniques can help remove polish residue effectively, restoring an even finish.
Addressing Paint Burning and Damage
Paint burning is a serious issue that can occur during aggressive polishing. Strike-through prevention and identification are vital.
Strike-Through Prevention and Identification
Preventing strike-through involves using the correct polishing compounds and being cautious with your polishing technique. Early identification can prevent further damage.
Maintaining Your Car’s Polished Finish
A polished car finish is not just about the initial polish; it’s about ongoing maintenance to keep your vehicle looking its best. Regular care ensures that your car’s paint remains in top condition, preserving the shine and protecting the surface.
Proper Washing Techniques to Preserve Shine
Washing your car correctly is crucial to maintaining its polished finish. Improper washing techniques can lead to scratches and swirl marks.
Touchless Washing Options
Consider using touchless washing options to minimize the risk of scratches. These systems use high-pressure jets of water to clean the vehicle without physical contact.
Microfiber Selection and Maintenance
When washing by hand, use high-quality microfiber towels. These are gentle on the paint and effective at absorbing water. Regularly wash and dry microfiber towels to prevent dirt buildup.
Regular Maintenance Schedule for Lasting Results
Establishing a regular maintenance schedule is vital. This includes regular washing, periodic waxing or sealing, and inspections for damage.
Seasonal Protection Considerations
Adjust your maintenance routine according to the season. For example, use products that protect against UV rays in the summer and against salt and grime in the winter.
Quick Touch-Up Methods Between Full Polishing Sessions
For quick touch-ups, consider using spray detailers or waterless wash products. These can help maintain the appearance of your car between more thorough polishing sessions.
Spray Detailers and Waterless Wash Products
- Spray detailers can enhance gloss and remove minor contaminants.
- Waterless wash products offer a convenient way to clean your car without water.
By following these maintenance tips, you can enjoy a lasting, showroom shine on your vehicle.
Elevating Your Car to Showroom Quality: Final Tips and Tricks
Achieving a showroom shine on your vehicle requires attention to detail and a commitment to using the best car polishing techniques. By following the steps outlined in this article, you’ll be well on your way to a flawless finish.
To take your car’s appearance to the next level, focus on precision when applying car detailing tips. Use the right polishing compounds and pads for your vehicle’s specific paint type, and work in a well-ventilated area to prevent contamination.
Regular maintenance is key to maintaining that showroom shine. Regularly washing your car with a mild soap and drying it with a microfiber towel will help prevent water spots and scratches. By combining these car detailing tips with the best car polishing techniques, you’ll be able to achieve a long-lasting, professional-grade finish.
By mastering the best car polishing techniques and following these final tips, you’ll be able to achieve a showroom shine that turns heads on the road. With patience and practice, you’ll be able to elevate your car’s appearance and enjoy a flawless finish for miles to come.