Protecting your vehicle’s paint job has never been easier, thanks to the advancements in automotive care technology. Learning how to apply ceramic coating has become an essential skill for car owners who want to safeguard their car’s exterior against the elements. This innovative coating provides a durable layer of protection, making maintenance a breeze.
By following a step-by-step guide, you can ensure a successful application. Not only does ceramic coating shield your vehicle from harmful UV rays and contaminants, but it also enhances its appearance, giving it a glossy finish. Proper application is key to reaping these benefits.
Key Takeaways
- Understand the benefits of using ceramic coating for your vehicle.
- Learn the importance of a step-by-step application process.
- Discover how to apply ceramic coating at home.
- Find out how ceramic coating can protect your vehicle’s paint.
- Enhance your vehicle’s appearance with a glossy finish.
Understanding Ceramic Coating and Its Benefits
Ceramic coating has become a popular choice for vehicle protection, but what exactly is it and how does it benefit your car? This advanced protective layer is designed to safeguard your vehicle’s paint from environmental contaminants and minor scratches. By understanding its composition and advantages, you can make an informed decision about whether ceramic coating is right for your vehicle.
For a deeper dive into its full range of benefits, check out our detailed blog: Discover the Advantages of Ceramic Coating.
What Is Ceramic Coating?
Ceramic coating is a liquid polymer applied to the exterior of a vehicle to create a protective barrier against the elements. It bonds with the paint to form a durable, hydrophobic layer that repels water and contaminants.
Chemical Composition and Properties
The chemical composition of ceramic coatings typically includes silicon dioxide (SiO2) and titanium dioxide (TiO2), which provide hardness and UV protection. These components work together to create a robust barrier that shields your vehicle’s paint.
Difference Between Ceramic Coating and Traditional Waxes
Unlike traditional waxes, ceramic coatings offer a more durable and long-lasting protective layer. While waxes provide a temporary barrier that must be reapplied regularly, ceramic coatings can last for years with proper maintenance.
Advantages of Ceramic Coating for Your Vehicle
Ceramic coating offers several benefits for vehicle owners, including enhanced appearance and protection against environmental contaminants.
Enhanced Gloss and Appearance
The application of a ceramic coating can deepen the gloss of your vehicle’s paint, making it look newer and more vibrant. This enhanced appearance is due to the coating’s ability to fill minor scratches and imperfections.
Protection Against Environmental Contaminants
Ceramic coatings protect your vehicle’s paint from harmful contaminants such as acid rain, bird droppings, and UV rays. This protection helps maintain the integrity and appearance of the paint over time.
Types of Ceramic Coatings Available
Ceramic coatings come in various formulations, catering to different needs and preferences.
Consumer-Grade vs. Professional-Grade Products
Consumer-grade ceramic coatings are available for DIY application, while professional-grade products are typically used by detailers and require specialized training. The choice between these options depends on your level of expertise and the desired outcome.
Durability Expectations by Product Type
| Product Type | Durability | Maintenance Requirements |
|---|---|---|
| Consumer-Grade | 1-2 years | Regular washing and occasional top-up |
| Professional-Grade | 2-5 years | Regular washing and maintenance checks |

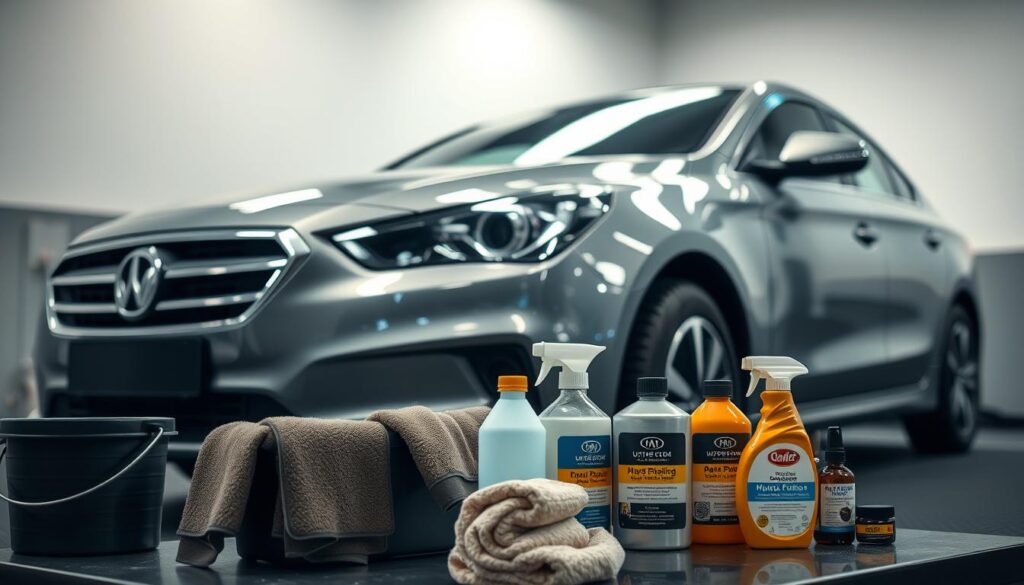
Essential Tools and Materials Needed
Before you start applying ceramic coating, it’s crucial to have the necessary tools and materials. This ensures a smooth application process and a professional finish.
Ceramic Coating Products
Selecting the Right Coating for Your Needs
Choosing the right ceramic coating product depends on your vehicle’s specific needs and the level of protection you desire. Consider factors like durability, gloss enhancement, and hydrophobic properties.
Understanding Product Specifications
It’s essential to read and understand the product specifications, including the concentration of SiO2, the recommended thickness of the coating, and the curing time.
| Product Feature | Description | Importance |
|---|---|---|
| SiO2 Concentration | Measures the durability and hardness of the coating | High |
| Curing Time | Time required for the coating to fully harden | High |
| Hydrophobic Properties | Water-repelling ability of the coating | Medium |
Application Tools
Applicator Blocks and Suede Cloths
Applicator blocks help in evenly spreading the coating, while suede cloths are used for buffing and removing excess product.
For tougher buffing jobs or applying polish compounds, don’t forget to check out our range of professional polishing pads in our shop—designed for precision, durability, and a flawless finish.
Microfiber Towels and Their Importance
Microfiber towels are crucial for cleaning and drying the vehicle’s surface before and after applying the coating.
Check the best-selling microfiber towels in Amazon by visiting our shop.

Safety Equipment
Gloves and Respiratory Protection
Wearing gloves protects your skin from the coating chemicals, while respiratory protection prevents inhaling harmful fumes.
Here are three highly-rated Amazon products that offer essential protection during car detailing:
1. Black Rhino Heavy‑Duty Nitrile Gloves
-
Industrial-strength nitrile gloves with raised texture—excellent grip for wet surfaces and chemical resistance.
-
Based on independent reviews, gloves in this class (Ammex/Gloveworks style) rate 8 mil thick and are praised for durability
-
Ideal for handling solvents, wax removers, and clay without tearing.
Get Black Rhino Heavy-Duty Nitrile Gloves on Amazon.
2. 3M Half Mask Respirator (7502)
-
A reusable silicone half-face respirator with Cool Flow™ valve.
-
Comfortable fit, easy to adjust, and venting works well under welding shields—great for polishing or working with strong chemical coatings
-
Pairs with bayonet-style particulate (e.g., P100) or organic vapor filters.
Shop the 3M Half Mask Respirator (7502) on Amazon.
3. STANLEY FFP3 Dust Respirator
-
A certified FFP3-rated dust mask for high-level particulate filtration.
-
Budget-friendly, disposable, and suitable for blocking fine mists and dust during buffing or sanding tasks.
-
Rated 4.6/5—great option for single-use protection without filter maintenance.
Grab the STANLEY FFP3 Dust Respirator on Amazon.
Eye Protection and Proper Ventilation
Eye protection is vital to prevent splashes from reaching your eyes, and proper ventilation ensures a safe working environment by removing fumes.
Preparing Your Vehicle for Ceramic Coating
The key to a successful ceramic coating application lies in the preparation of your vehicle’s surface. Proper preparation ensures a flawless finish and maximizes the durability of the coating.
Washing and Decontaminating the Surface
Begin by washing your vehicle using the Two-Bucket Wash Method to prevent scratches. This involves using one bucket for soapy water and another for clean water to rinse your wash mitt.
Two-Bucket Wash Method
This method is crucial for minimizing the risk of swirl marks. Ensure you rinse your wash mitt frequently.
Iron Remover and Tar Remover Applications
After washing, apply an iron remover to eliminate iron contaminants and a tar remover to remove tar and bug splatters.
Clay Bar Treatment
A clay bar treatment is necessary to remove any remaining contaminants. Selecting the right clay bar depends on the level of contamination and the type of paint on your vehicle.
Selecting the Right Clay Bar
Choose a clay bar that is appropriate for your vehicle’s paint type. Some clay bars are more aggressive than others.
Here are two highly-rated clay bar options available on Amazon , perfect for different paint types:
1.Meguiar’s Smooth Surface Clay Kit
-
Type: Light–medium grade clay bar kit with lubricant
-
Why it’s great: Rated 4.6★ by over 3,900 reviewers, this kit is Amazon’s top pick for safe and effective claying
-
Used in: Ideal for general paint types—removes bonded contaminants without being overly aggressive
Try Meguiar’s Smooth Surface Clay Kit on Amazon.
2.Mothers California Gold Clay Bar System
-
Type: Fine clay bar with spray lubricant
-
Why it’s great: Also rated 4.6★, this system is praised for leaving surfaces “smooth as glass” and easy to use.
-
Used in: Perfect for delicate or softer paint finishes, offering gentle but thorough cleaning
Get the Mothers California Gold Clay Bar System on Amazon.
Proper Clay Bar Technique
Use a clay bar lubricant and gently glide the clay bar across the surface. This will pick up contaminants without scratching the paint.
Paint Correction Process
Assess your vehicle’s paint condition to determine the necessary correction steps.
Assessing Paint Condition
Inspect the paint for scratches, swirl marks, and other imperfections.
Polishing and Compounding Steps
Use a polishing compound to correct imperfections. Follow up with a finer polish to refine the finish.
Final IPA Wipedown
Finish with an IPA (Isopropyl Alcohol) wipedown to remove any remaining residue, ensuring a clean surface for the ceramic coating.
| Preparation Step | Purpose | Tools/Products |
|---|---|---|
| Washing and Decontamination | Remove dirt and contaminants | Two-Bucket Method, Iron Remover, Tar Remover |
| Clay Bar Treatment | Remove remaining contaminants | Clay Bar, Clay Bar Lubricant |
| Paint Correction | Correct paint imperfections | Polishing Compound, Polish, IPA |

By following these steps, you can ensure your vehicle is properly prepared for ceramic coating, resulting in a flawless ceramic coating application that provides long-lasting protection.
Creating the Ideal Application Environment
To ensure a professional-grade ceramic coating, it’s essential to create an ideal application environment. This involves careful consideration of several key factors that directly impact the quality and durability of the coating.
Temperature and Humidity Considerations
The temperature and humidity levels in your workspace significantly affect the ceramic coating’s curing process and overall performance.
Optimal Temperature Range
The ideal temperature for applying ceramic coating is between 60°F to 80°F (15°C to 27°C). Avoid applying at temperatures outside this range, as it can affect the coating’s adhesion and curing time.
Humidity Effects on Curing
Humidity levels should be between 40% to 60%. High humidity can slow down the curing process, while very low humidity can cause it to cure too quickly, potentially leading to imperfections.
Workspace Setup
A well-organized workspace is crucial for a successful application.
Dust-Free Environment Creation
Ensure your workspace is dust-free. Use a dust collector or a HEPA-filter vacuum to minimize airborne particles.
Organizing Your Work Area
Keep all necessary tools and materials within easy reach. This helps in maintaining a smooth workflow and reduces the risk of contamination.
| Environmental Factor | Ideal Condition |
|---|---|
| Temperature | 60°F – 80°F (15°C – 27°C) |
| Humidity | 40% – 60% |
Lighting Requirements
Adequate lighting is essential for inspecting the vehicle’s surface.
Using Inspection Lights
Utilize LED inspection lights to identify any imperfections or areas that require additional attention before applying the coating.
How to Apply Ceramic Coating Properly
To ensure a durable and glossy finish, it’s crucial to follow the correct steps of how to apply ceramic coating. This process involves several key stages that, when executed properly, result in a professionally coated vehicle.
Sectioning Your Vehicle
Dividing your vehicle into sections is essential for a thorough and even application. This approach helps in managing the application process more efficiently.
Breaking Down the Vehicle Into Manageable Areas
Start by dividing your vehicle into larger sections such as the hood, roof, and trunk. Then, further divide these sections into smaller areas. This will make it easier to apply the ceramic coating evenly.
Working Order Strategy
It’s advisable to work from the top down to prevent any potential drips or spills from affecting already coated areas. Start with the roof, then move to the hood, trunk, and finally the sides.
how to apply ceramic coating with proper Application Technique
The technique used in applying ceramic coating is critical to achieving a smooth, even finish.
Proper Amount of Product
Using the right amount of ceramic coating product is vital. Too little may not provide adequate coverage, while too much can lead to uneven application and waste.
Cross-Hatch Application Pattern
Adopting a cross-hatch pattern ensures an even application. Apply the coating in one direction, then immediately cross-hatch it by applying in a perpendicular direction. This technique helps in achieving a uniform layer.
Pressure and Speed Considerations
Apply gentle to moderate pressure, depending on the product’s instructions. The speed of application should be steady and consistent to avoid creating air pockets or unevenness.
Common Application Mistakes to Avoid
Being aware of common mistakes can significantly improve the outcome of your ceramic coating application.
how to apply ceramic coating without using too much product?
Using too much product can lead to a sticky surface and attract dust and debris. It’s better to apply thin, even coats.
Working in Direct Sunlight
Direct sunlight can cause the product to dry too quickly, leading to uneven finishes. Work in shaded areas or under indirect sunlight.
Inconsistent Application Patterns
Maintaining a consistent application pattern is crucial for an even finish. Ensure that you cover the entire section evenly before moving on to the next.
By following these how to apply ceramic coating guidelines and being mindful of the common pitfalls, you can achieve a professional-grade ceramic coating application that protects your vehicle’s paint and maintains its appearance over time.
The Leveling and Removal Process
To ensure a professional-grade finish, understanding the intricacies of the leveling and removal process is essential. This step is critical in achieving a flawless ceramic coating application.
Timing Your Removal
The timing of the removal process is crucial and can be influenced by several factors, including the type of ceramic coating used and environmental conditions.
Flash Time Indicators
Most ceramic coatings come with flash time indicators that signal when the coating is ready for removal. These indicators can be in the form of a color change or a change in the coating’s sheen.
Temperature Effects on Removal Timing
Temperature plays a significant role in the curing process of ceramic coatings. Higher temperatures can accelerate the curing process, while lower temperatures can slow it down. It’s essential to follow the manufacturer’s guidelines for temperature ranges.
Proper Buffing Techniques
Buffing is a critical step in the leveling and removal process. It requires the right tools and techniques to achieve a high-gloss finish.
Microfiber Selection and Usage
The choice of microfiber cloth is crucial. A high-quality microfiber cloth that is free of lint and defects is necessary for buffing ceramic coatings.
Buffing Pressure and Direction
Applying the correct buffing pressure and direction is vital. Too much pressure can create scratches or swirl marks, while too little may not effectively remove excess coating.
Inspecting for High Spots
After buffing, inspecting the surface for high spots or defects is necessary. This step ensures that the finish is even and of high quality.
Using Different Light Sources
Using different light sources, such as natural light or a LED inspection light, can help identify defects or high spots that may not be visible under other lighting conditions.
Correcting Application Issues
If any issues are identified during inspection, they should be addressed promptly. This may involve re-buffing or applying additional coats of ceramic coating.
Troubleshooting Streaks and Smears
Streaks and smears can occur if the buffing technique is not correct. Troubleshooting these issues involves adjusting the buffing pressure, direction, or the type of microfiber cloth used.
| Common Issues | Troubleshooting Tips |
|---|---|
| Streaks | Adjust buffing pressure and direction |
| Smears | Use a clean microfiber cloth and adjust buffing technique |
| High Spots | Inspect under different light sources and re-buff as necessary |
By mastering the leveling and removal process, detailers can ensure a flawless finish that enhances the durability and appearance of the ceramic coating.
Multiple Coating Layers: When and How
For those looking to maximize their vehicle’s protection, understanding how to apply multiple layers of ceramic coating is crucial. This process can significantly enhance the durability and appearance of the vehicle’s paintwork.
Benefits of Multiple Layers
Applying multiple layers of ceramic coating can offer several benefits, including increased protection thickness and enhanced durability and appearance.
Increased Protection Thickness
Each layer of ceramic coating adds to the overall thickness of the protective barrier, providing a more robust defense against environmental contaminants and minor scratches.
Enhanced Durability and Appearance
Multiple layers can enhance the vehicle’s gloss and hydrophobic properties, making it easier to clean and maintain. The added durability means the coating can withstand harsh conditions better.
Proper Timing Between Coats
Understanding the proper timing between applying coats is critical for achieving the best results.
Manufacturer Recommendations
It’s essential to follow the manufacturer’s guidelines for the recommended time between coats. This ensures that each layer is properly cured before the next is applied.
Testing for Readiness
In addition to following manufacturer recommendations, testing the surface for readiness can help determine if the previous layer is fully cured and ready for the next application.
Maximizing Protection with Layering
Strategic layering can maximize the protective benefits of ceramic coating.
Diminishing Returns Consideration
While multiple layers offer enhanced protection, there’s a point of diminishing returns. Applying too many layers may not provide proportional benefits and could be wasteful.
Strategic Layering for High-Wear Areas
Focusing additional layers on high-wear areas, such as the hood and front bumper, can provide targeted protection where it’s needed most.
By understanding the benefits and best practices for applying multiple layers of ceramic coating, vehicle owners can achieve superior protection and maintain their vehicle’s appearance for years to come.
Curing and Post-Application Care
Proper curing and post-application care are vital for a flawless ceramic coating application. After you’ve applied the ceramic coating, the curing process is critical for its durability and effectiveness.
Curing Time Requirements
The curing time is a crucial factor in the overall performance of the ceramic coating. It’s essential to understand the difference between initial and full cure times.
Initial vs. Full Cure Times
The initial cure time refers to when the coating starts to set, while the full cure time is when it reaches its maximum hardness and chemical resistance. Typically, the initial cure can take anywhere from a few hours to a day, depending on environmental conditions.
Accelerating the Curing Process
While it’s generally recommended to let the coating cure naturally, there are methods to accelerate the process, such as using a curing accelerator or ensuring good airflow. However, it’s crucial to follow the manufacturer’s instructions.
Environmental Protection During Curing
Protecting your vehicle from environmental factors during the curing process is vital.
Garage Storage Recommendations
Storing your vehicle in a garage can protect it from direct sunlight and rain. Ensure the garage is well-ventilated to facilitate proper curing.
Weather Considerations
Avoid exposing your vehicle to extreme weather conditions during the curing process. If possible, wait for a period of mild weather before applying the coating.
First Wash After Coating
The first wash after applying ceramic coating is a delicate process.
When to Perform the First Wash
It’s generally recommended to wait at least 24 to 48 hours before washing your vehicle. This allows the coating to cure sufficiently.
Gentle Washing Techniques
Use a mild soap and a soft, microfiber wash mitt to clean your vehicle. Avoid using high-pressure washes or harsh chemicals.
Products to Avoid During Initial Period
| Product | Reason to Avoid |
|---|---|
| Harsh Chemicals | Can strip away the coating |
| Abrasive Sponges | Can scratch the surface |
| High-Pressure Washes | Can damage the coating |
By following these guidelines, you can ensure a flawless ceramic coating application and enjoy long-lasting protection for your vehicle.
Maintaining Your Ceramic Coated Vehicle for Lasting Protection
To ensure the longevity of your ceramic coating, regular maintenance is crucial. By following a step-by-step ceramic coating guide, you’ve already taken the first step towards protecting your vehicle’s paint. Now, it’s essential to maintain it properly.
Mastering ceramic coating application is just the beginning; regular washing and decontamination are vital to prevent dirt and grime from damaging the coating. Use a mild soap and avoid harsh chemicals that can strip away the coating.
A how to apply ceramic coating tutorial will typically advise on the importance of drying your vehicle thoroughly after washing to prevent water spots. Regularly inspect your vehicle’s paint for any signs of damage or wear, and address these issues promptly.
By following these simple maintenance tips and continuing to follow a ceramic coating technique tutorial, you can discover how to apply ceramic coating properly and enjoy a protected and glossy finish for years to come. Proper care will ensure that your vehicle’s ceramic coating remains effective, keeping it looking its best.