Did you know that automotive surface contamination can lead to significant damage if left untreated, compromising your car’s paint appearance and longevity? Iron particles, in particular, can cause etching and oxidation, resulting in a dull finish.
To maintain your vehicle’s pristine condition, it’s crucial to remove these contaminants effectively. In this guide, we’ll walk you through the process of paint restoration by removing iron contaminants, ensuring a flawless finish that looks like a professional detailing job.
Key Takeaways
- Understanding the importance of removing iron contaminants for car paint restoration
- Learning the process of effective paint restoration
- Discovering how to maintain your vehicle’s paint in pristine condition
- Identifying the role of automotive surface contamination in paint damage
- Achieving a flawless finish through proper restoration techniques
Understanding Iron Contamination on Car Paint
Understanding the causes and effects of iron contamination is essential for maintaining a car’s paintwork. Iron contamination on car paint is a pervasive issue that arises from various environmental factors, impacting both the appearance and longevity of a vehicle’s finish.
What Causes Iron Deposits on Vehicles
Iron deposits on vehicles are primarily caused by environmental factors. These include rail dust, industrial fallout, brake dust, and road contaminants, all of which contain iron particles that can settle on and adhere to the vehicle’s paint surface.
Rail Dust and Industrial Fallout
Rail dust and industrial fallout are significant contributors to iron contamination. Rail dust is generated from the wear and tear of rail tracks, while industrial fallout comes from various industrial processes. Both contain iron particles that can travel through the air and settle on vehicles.
Brake Dust and Road Contaminants
Brake dust, produced by the friction between brake pads and rotors, is another major source of iron contamination. Additionally, road contaminants, including particles from road wear and tear, can also contain iron, further contaminating the paint.

How to Identify Iron Contamination
Identifying iron contamination is crucial for taking corrective action. There are several methods to detect iron deposits on car paint, including visual inspection techniques and the plastic bag test.
Visual Inspection Techniques
A visual inspection involves closely examining the vehicle’s paint surface for signs of iron contamination, such as small rust spots or a rough texture. This method requires a keen eye and, often, the right lighting conditions.
The Plastic Bag Test
The plastic bag test is a simple, effective method for detecting iron contamination. By sliding a plastic bag over the paint surface, one can feel the roughness caused by iron particles, indicating their presence.
Why Iron Removal is Crucial for Paint Maintenance
Iron contamination can significantly impact your car’s paint job if not addressed. The presence of iron particles on your vehicle’s surface can lead to various forms of damage, ultimately affecting both the appearance and integrity of the paint.
Damage Caused by Untreated Iron Particles
When iron particles are left untreated on your car’s paint, they can cause significant damage. Two primary concerns are paint etching and oxidation, as well as long-term effects on the clear coat.
Paint Etching and Oxidation
Iron particles can etch into the paint surface, creating small pits that not only affect the appearance but also provide a site for further contamination. Additionally, iron can catalyze oxidation reactions, leading to the degradation of the paint’s chemical structure.
Long-term Effects on Clear Coat
The clear coat is particularly vulnerable to damage from iron contamination. Over time, untreated iron particles can compromise the clear coat’s integrity, leading to a dull appearance and potentially requiring costly repairs.
| Damage Type | Description | Consequence |
|---|---|---|
| Paint Etching | Small pits on the paint surface | Affects appearance and invites further contamination |
| Oxidation | Degradation of paint’s chemical structure | Leads to paint deterioration |
| Clear Coat Damage | Compromised clear coat integrity | Dull appearance and potential for costly repairs |
Benefits of Regular Iron Decontamination
Regular iron decontamination offers several benefits, including improved paint appearance and gloss, as well as an extended paint lifespan.
Improved Paint Appearance and Gloss
By removing iron contaminants, your car’s paint can regain its original shine and appearance. This not only enhances the vehicle’s aesthetic appeal but also indicates a healthy paint surface.
Extended Paint Lifespan
Regular iron removal can significantly extend the lifespan of your car’s paint. By preventing damage from iron particles, you can delay the need for paint correction or reapplication.

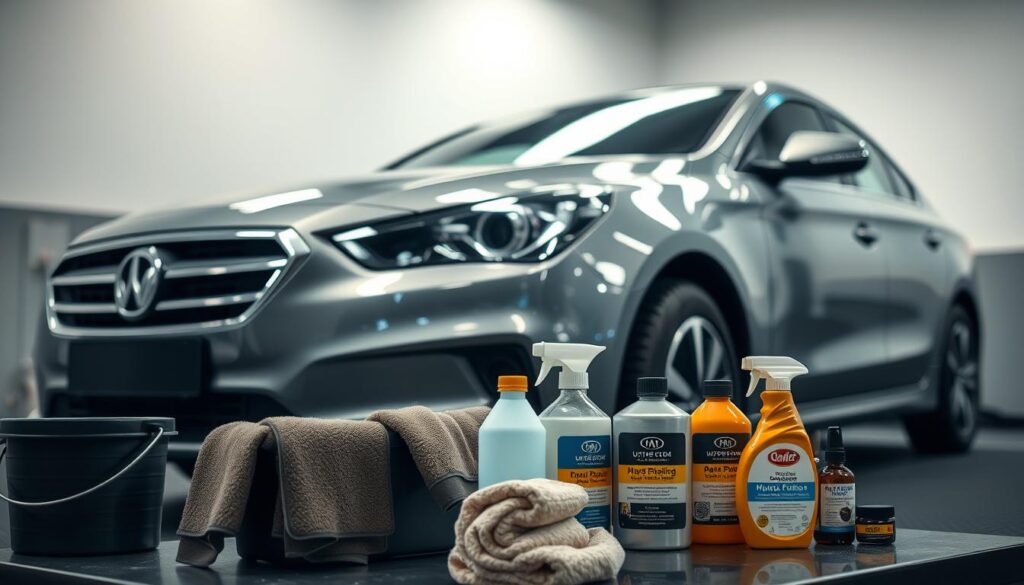
Essential Tools and Products for Iron Removal from Car Paint
To restore your car’s paint to its original shine, you’ll need specific products and equipment. Iron removal is a critical step in car paint restoration, and having the right tools makes all the difference.
Chemical Iron Removers: Types and Recommendations
Chemical iron removers are a crucial component in the iron removal process. They come in different formulations, each with its own set of advantages.
pH-Neutral vs. Acidic Formulations
pH-neutral iron removers are gentle on the car’s paint and are suitable for regular maintenance. Acidic formulations, on the other hand, are more aggressive and are used for severe iron contamination. Choosing the right formulation depends on the level of contamination and the paint’s condition.
Top-Rated Products for Different Budgets
There are various top-rated iron remover products available across different price ranges. For budget-conscious buyers, options like Meguiar’s Iron Decontamination Spray are effective. For those willing to invest in premium products, brands like 3M offer high-quality solutions.
Mechanical Tools for Iron Decontamination
Alongside chemical removers, mechanical tools play a vital role in iron decontamination. These tools help in physically removing iron particles from the paint surface.
Clay Bars and Clay Mitts
Clay bars and mitts are used to gently remove iron particles and other contaminants. They are an essential tool for a thorough decontamination process.
Microfiber Applicators and Wash Mitts
Microfiber applicators and wash mitts are used for applying iron removers and for washing the car. They are gentle on the paint and effective in removing dirt and contaminants.
Safety Equipment You’ll Need
Safety should be a top priority when working with chemical iron removers and mechanical tools. Proper safety equipment protects you and your car’s paint.
Personal Protection Gear
Gloves and protective eyewear are essential personal protection gear. They protect against chemical splashes and other hazards.
Surface and Environmental Protection
Using drop cloths and protective coverings for surrounding surfaces can prevent damage from chemical spills. It’s also important to work in a well-ventilated area.
Preparing Your Vehicle for Iron Removal
Proper preparation is key to successful iron removal from your car’s paint, involving a thorough wash and consideration of environmental factors. This step is crucial for effective decontamination and to prevent any damage to the vehicle’s paint.
Proper Washing Techniques Before Decontamination
Washing your car before iron removal is not just about cleanliness; it’s a critical step that ensures the decontamination product works effectively on the iron particles rather than being wasted on loose dirt.
Two-Bucket Wash Method
The two-bucket wash method is highly recommended. One bucket is filled with soapy water, and the other with clean water for rinsing your wash mitt. This technique minimizes the risk of scratching the paint.
Pre-Wash Considerations
Before the main wash, consider removing tar and bug splatters using appropriate products. This step prevents these contaminants from being spread during the wash, making the process more efficient.
Environmental Considerations and Workspace Setup
The environment in which you perform iron removal can significantly impact the results. Factors such as temperature and sunlight exposure can affect the product’s efficacy and the paint’s condition.
Temperature and Sunlight Factors
It’s best to perform iron removal in shaded areas or on cloudy days. Avoid direct sunlight, especially during peak hours, as it can cause the product to dry too quickly, reducing its effectiveness.
Water Access and Drainage Requirements
Ensure you have access to plenty of water for rinsing and that your workspace allows for proper drainage. This setup prevents water from pooling, which can lead to spotting or mineral deposits on the paint.
| Preparation Step | Purpose | Best Practice |
|---|---|---|
| Two-Bucket Wash | Minimize scratching risk | Use separate buckets for soapy and clean water |
| Pre-wash for tar and bugs | Prevent spreading contaminants | Use specific removal products before main wash |
| Shaded Workspace | Prevent product from drying too quickly | Choose shaded area or work on cloudy days |
Step-by-Step Iron Removal Process from Car Paint
To restore your car’s paint to its original condition, it’s crucial to follow a systematic iron removal process. This process not only enhances the appearance of your vehicle but also protects the paint from further damage caused by iron contamination.
1. Initial Assessment and Testing
Before applying any iron removal products, it’s essential to assess the level of contamination on your car’s paint. This step helps in determining the appropriate products and techniques to use.
Test Spot Selection
Choose a small, inconspicuous area on your car to test the iron remover. This could be on a door jamb or under the rear bumper. The test spot should be representative of the overall contamination level.
Evaluating Contamination Severity
Assess the test spot to understand the severity of the iron contamination. This evaluation will guide you in selecting the right product and in deciding how many applications might be needed.
2. Applying Iron Remover Products
Once you’ve assessed the contamination level, it’s time to apply the iron remover. The method of application can significantly affect the outcome.
Spray Techniques for Even Coverage
Spray the iron remover evenly onto the car’s surface, ensuring that all contaminated areas are covered. Avoid spraying in direct sunlight or on hot surfaces.
Section-by-Section Application Strategy
Divide your car’s surface into sections and apply the iron remover one section at a time. This approach helps in maintaining even coverage and prevents the product from drying out before it can be rinsed off.
3. Dwell Time and Reaction Process
After applying the iron remover, it’s crucial to allow it to dwell on the surface for the recommended time. This dwell time enables the product to react with the iron particles.
Understanding the Color-Changing Reaction
Many iron removers change color when they react with iron particles, typically turning purple or pink. This color change indicates that the product is working effectively.
Optimal Timing Guidelines
Follow the product’s instructions for the optimal dwell time. Leaving the product on for too long can potentially damage the paint, while rinsing it off too soon might not effectively remove all iron contamination.
4. Rinsing and Evaluating Results
After the dwell time has elapsed, rinse the iron remover off thoroughly and evaluate the results. This step is crucial in determining if additional applications are needed.
Proper Rinsing Techniques
Rinse the car’s surface with plenty of water to remove all traces of the iron remover. Use a microfiber towel to dry the surface gently and prevent water spots.
Determining if Additional Applications are Needed
Inspect the paint surface after rinsing. If iron contamination is still visible, you may need to repeat the application process until the desired level of cleanliness is achieved.
By following this step-by-step guide, you can effectively remove iron contamination from your car’s paint, enhancing its appearance and protecting it from potential damage.
Advanced Techniques for Stubborn Iron Contamination
Advanced techniques are crucial for tackling stubborn iron contamination that resists conventional removal methods. When standard iron removal processes fail to deliver the desired results, detailing professionals and car enthusiasts alike must turn to more sophisticated strategies.
Clay Bar Treatment After Chemical Decontamination
One effective advanced technique involves using a clay bar after chemical decontamination. This process helps remove any remaining contaminants that the chemical treatment might have missed.
Clay Bar Selection and Lubrication
Selecting the right clay bar is crucial. A fine-grade clay bar is typically recommended for most vehicles. Proper lubrication is also essential to prevent scratching the paint surface. Use a high-quality detailing spray or lubricant specifically designed for clay bar treatment.
Proper Clay Bar Technique
To use a clay bar effectively, work in small sections, gently gliding the clay bar back and forth. If the clay bar stalls or feels rough, stop immediately and inspect the area. Re-lubricate if necessary, and continue until the surface feels smooth.
Multiple Application Strategies
Sometimes, a single application of iron remover is not enough. Multiple application strategies can be employed to tackle stubborn contamination.
Increasing Dwell Time Safely
One approach is to increase the dwell time of the iron remover. However, this should be done cautiously to avoid damaging the paint. Always follow the product’s instructions and test on a small area first.
Product Concentration Adjustments
Another strategy involves adjusting the concentration of the iron remover. Some products can be diluted or used at full strength, depending on the level of contamination.
Professional-Grade Solutions for Severe Cases
In cases of severe iron contamination, professional-grade solutions or professional detailing services may be necessary.
When to Consider Professional Detailing Services
If DIY methods fail to remove the contamination, or if you’re unsure about the best approach, it’s time to consider professional detailing services. Professionals have access to high-grade products and the expertise to use them effectively.
Cost-Benefit Analysis of DIY vs. Professional Work
When deciding between DIY methods and professional detailing services, consider the cost-benefit analysis. While professional services may seem more expensive upfront, they can prevent costly repairs down the line by ensuring a thorough and safe decontamination process.
| Treatment Method | Effectiveness | Cost |
|---|---|---|
| DIY Iron Remover | Moderate | $20-$50 |
| Clay Bar Treatment | High | $10-$30 |
| Professional Detailing | Very High | $100-$300 |
Common Mistakes to Avoid During Iron Removal
To achieve a flawless finish, it’s crucial to understand the common mistakes made during iron removal and how to avoid them. Iron remover products are designed to decontaminate automotive surfaces, but their effectiveness can be compromised by errors in application, timing, and environmental conditions.
Product Application Errors
One of the primary mistakes during iron removal is the incorrect application of iron remover products. This can lead to either overuse or underuse of the product.
Overuse and Underuse Problems
Using too much iron remover can lead to unnecessary waste and potentially damage the paint if the product is too harsh. Conversely, using too little may result in ineffective decontamination. Always follow the manufacturer’s instructions to avoid these issues.
Mixing Incompatible Products
Some iron removers may not be compatible with other detailing products or the vehicle’s paint type. Mixing incompatible products can lead to chemical reactions that damage the paint. Ensure that all products used are compatible and suitable for your vehicle’s paint.
Timing and Environmental Mistakes
Environmental conditions play a significant role in the effectiveness of iron removal. Timing is also crucial, as certain conditions can affect the product’s dwell time and reaction process.
Working in Direct Sunlight
Direct sunlight can cause iron remover products to dry too quickly, reducing their effectiveness. It’s advisable to work in shaded areas or under cloudy conditions to maintain control over the product’s dwell time.
Ignoring Temperature Guidelines
Most iron remover products have optimal temperature ranges for application. Ignoring these guidelines can affect the product’s performance and potentially damage the paint. Always check the product’s recommended temperature range before application.
Surface Damage Prevention
Preventing surface damage during iron removal is critical. This involves not only the correct application of products but also taking steps to avoid physical damage to the vehicle’s surface.
Avoiding Scratches During the Process
Using the right tools and techniques can help avoid scratches. Microfiber towels and gentle applicators are recommended to minimize the risk of scratching the paint.
Protecting Sensitive Trim and Components
Sensitive trim and components can be damaged by iron remover products. Use protective coverings or masking tape to protect these areas before applying any decontamination products.
| Common Mistakes | Consequences | Prevention |
|---|---|---|
| Overuse/Underuse of Iron Remover | Waste, ineffective decontamination, or paint damage | Follow manufacturer’s instructions |
| Mixing Incompatible Products | Chemical reactions damaging the paint | Ensure product compatibility |
| Working in Direct Sunlight | Product dries too quickly, reducing effectiveness | Work in shaded or cloudy conditions |
Post-Iron Removal Care and Protection
After successfully removing iron contamination from your car’s paint, it’s crucial to follow up with proper care and protection techniques to maintain the paint’s condition and appearance.
Proper Washing After Decontamination
Washing your car after iron removal is a delicate process. Using the right techniques and products is essential to prevent damage.
pH-Balanced Shampoo Selection
Choose a pH-balanced shampoo that is gentle on the paint and won’t strip away the wax or damage the clear coat.
Gentle Washing Techniques
Use soft, microfiber wash mitts and avoid circular motions, which can create scratches. Instead, use straight, overlapping strokes to clean the surface.
Applying Paint Protection
Applying a protective layer after iron removal is vital to shield the paint from future contamination and environmental damage.
Wax vs. Sealant vs. Ceramic Coating Options
There are several options for paint protection, including wax, sealants, and ceramic coatings. Each offers different levels of protection and durability.
| Protection Type | Durability | Ease of Application |
|---|---|---|
| Wax | Short-term (1-3 months) | Easy |
| Sealant | Medium-term (3-6 months) | Moderate |
| Ceramic Coating | Long-term (1-5 years) | Challenging |
Application Methods for Maximum Protection
Regardless of the product chosen, following the manufacturer’s instructions and applying it in a cool, shaded area will ensure maximum protection.
Maintenance Schedule to Prevent Future Buildup
Establishing a regular maintenance schedule is key to preventing iron buildup and maintaining your car’s paint.
Seasonal Decontamination Planning
Plan for seasonal decontamination to address different environmental conditions throughout the year.
Regular Inspection Routine
Regularly inspect your car’s paint for signs of contamination or damage, addressing any issues promptly to prevent them from becoming major problems.
Maximizing Your Car’s Paint Protection Investment
To keep your car’s paint in excellent condition, it’s crucial to combine effective iron removal techniques with proper paint protection and maintenance. Using a high-quality iron and fallout remover is the first step in this process, helping to eliminate contaminants that can damage the paint over time.
Regular inspections and seasonal decontamination planning play a significant role in preventing future buildup of automotive surface contamination. By staying on top of this maintenance, you can protect your investment and maintain your car’s appearance.
For those who want an extra layer of protection and care, considering professional detailing services can be beneficial. These services can provide advanced techniques and products to further safeguard your car’s paint, ensuring it remains in top condition for years to come.
By integrating these strategies, you can maximize your car’s paint protection investment, maintaining its value and aesthetic appeal.